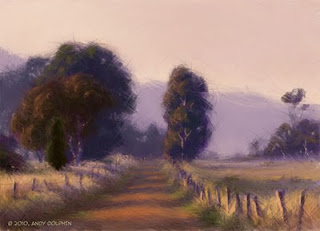
After my digital apple painting from a couple of days ago, I thought I’d try a digital landscape painting in Photoshop.
I’ve tried painting landscapes in Photoshop before but without much joy. This time I approached it just like an oil painting. I laid down a warm undertone across the whole “canvas”. Then I sketched in a simple composition then placed my major dark tones using a coarse, square stipple brush with opacity and dual brush pressure settings.
Then I adjusted shadow colours and laid in the local colours. There was quite a bit of to-ing and fro-ing from here with small adjustments to shadow colours and tones.
I used the smudge tool with a size and pressure setting to apply a cross-hatching finish that gives the piece a pastel feel, I think. I may have overdone it a little but I’m just trying things out here to see what works and what doesn’t.
To do this sort of thing you need a pen and tablet to access the brush pressure tools. It is also far easier to draw with the pen than with a mouse. It becomes quite natural very quickly. I have a small Wacom Graphire 4 tablet and Photoshop CS on a G5 Mac – I don’t use a mouse for anything.
Click on the image to see it at full size.
I did a limited-palette plein air painting of this scene last week but this digital piece was done from a photo with a bit of artistic licence thrown in as the photo didn’t really do the scene justice and my plein air piece was from an hour earlier when the light was cooler and the sky still blue.
This tiny digital painting took longer than the original plein air piece – about two hours. With both paintings to work from, I think I’ll do a larger oil painting soon.

