
Here’s a step-by-step breakdown of how I approach a digital landscape painting like the one I did this morning.
For this painting, I used a cartoony cross-hatch brush from Chris Wahl.
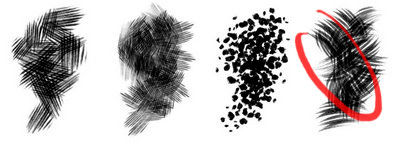
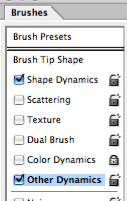
For this brush to work to full advantage, you need a pressure-sensitive stylus and Photoshop (other software might also do do this). The default settings for the brush work beautifully as the cross-hatch pattern randomly rotates as you paint. All I change is the brush size and sometimes I turn Other Dynamics – Opacity on or off. I do most of the painting with the Opacity setting on so that a light touch produces a translucent wash. This makes it easier to build blends and allows for a little variety within major tones.
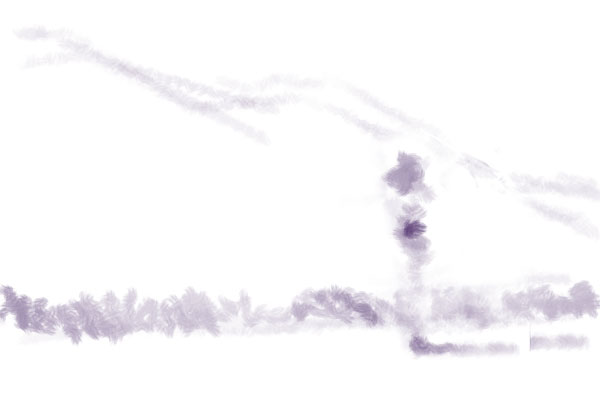
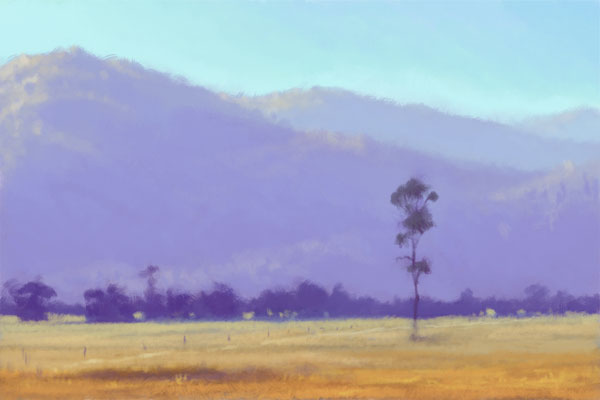
Step 1: Rough outline to locate main shapes. Since this painting was right out of my head, with no visual reference whatsoever, some things will change as I progress.
Step 2: Rough in undertones. Lighter and cooler in the distance, darker and warmer in the foreground. I adjusted the mountain shape so it would fully contain the main tree. I use a fairly large brush here to get the surface covered.
Step 3: Add weight to all tonal areas. I use some of the sky colour in the mountain colour. I do this by painting a transparent patch of the sky blue over the purple from Step 2. Then I select this colour with the eye dropper and apply it across the area. This helps to “absorb” the mountains into the atmosphere, especially the more-distant peaks.
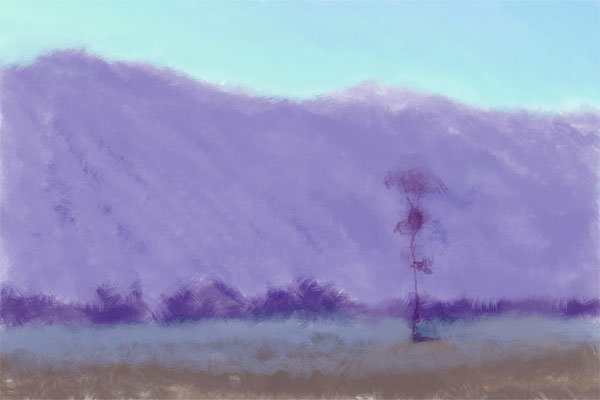
I introduce highlights in the background and mid-tones in the foreground. I re-establish the main tree and distant trees and some minor detail is added to indicate a fence and track. I’ve also introduced a foreground shadow being cast from a tree off to the left somewhere. This small detail instantly adds depth – plus I like shadows falling across white sand tracks!
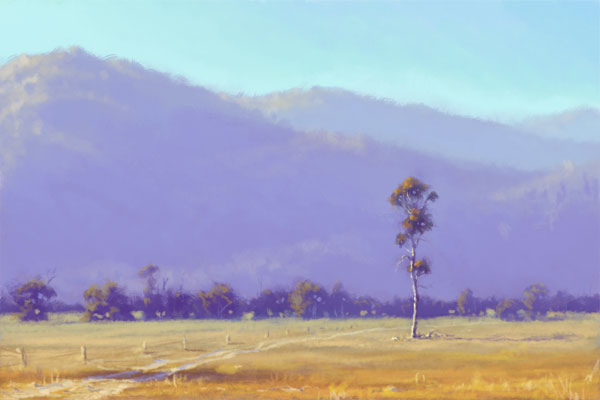
Step 4: Highlights are added to the foreground and middle distance. I’ve strengthened the track and foreground fence posts. By this stage, I’m adjusting the brush size up and down as I work on different areas.
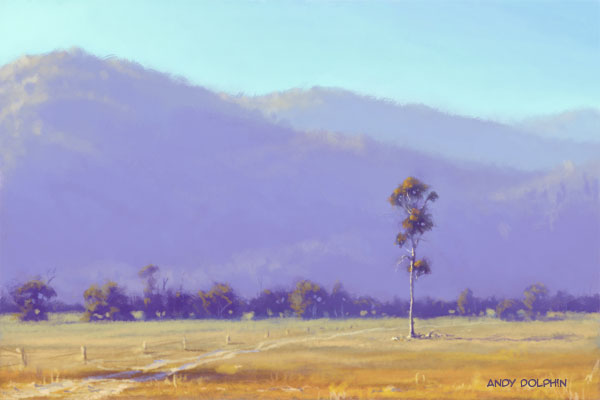
Step 5: I decided to change the shape of the main tree as the earlier shape looked a little “weak”. I’ve also marginally brightened the sky and added my digital signature.
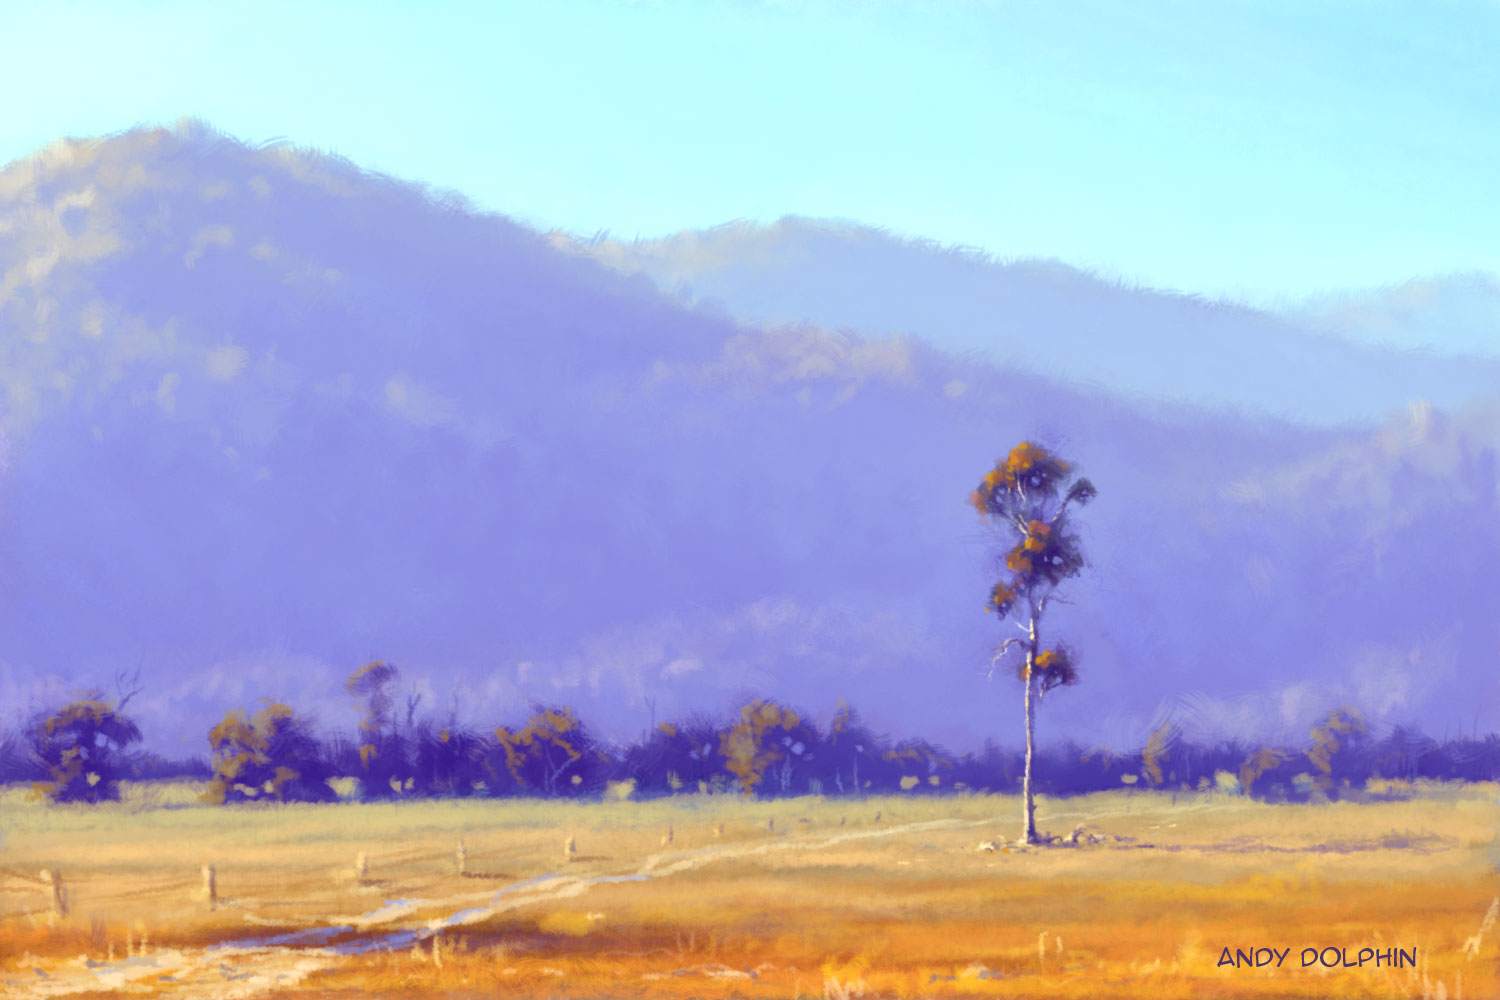
Step 6: Finally, I flattened the whole image, boosted the saturation a little and tweaked some minor details here and there across the whole painting. I could have adjusted the saturation with an adjustment layer instead of flattening – but I didn’t.
There is a about 30-40 minutes work in this. Note that at 1500 pixels wide, this image would only produce a high quality (300dpi) print about 12cm wide! If I wanted to do anything serious with it, I could work at this size up to around Step 4 then increase the resolution before continuing with detailing.
hi
Wow that is an amazing creation that you did.I liked the way you presented the step by step evolution of the image.The result is really very beautiful.The colors are merged so well that all look natural.Good work
Thanks DSF.
very convincing!